Friday, July 26, 2013

Corn Chowder

Monday at the cafe was Corn Chowder day. It was my favorite day for soup!! It was Max's favorite soup day too!! He couldn't wait until I came home from the cafe with leftovers and was very disappointed when there were none.

Max is spending a month with me and the first thing he asked me when he got here was "could we make corn chowder?" "Of course!" I said.


It's' an easy soup to make and when I make it, it's completely vegetarian. That's a big plus in the restaurant business when a lot of your customers are vegetarians.

Max is my 9 year old grandson for those of you that don't know me. He used to come to the cafe and walk around like he owned the place. Max and my other grandson Logan loved to play in the basement. It had all kinds of nooks and crannies. But they also loved to help me in the kitchen. Max is finally old enough that I can start teaching him how to cook from beginning to end with out him losing interest.

So tonight we made corn chowder, and as you can see by the pictures, Max loved every minute of it. From beginning to end.

Teri


Corn Chowder

1 stick of butter
1 small onion
1 carrot (8 small carrots)
1 celery stalk
1 clove of garlic
1/2 cup of flour
3 cups of extra sweet corn
3 cups of stock (chicken or vegetable)
2 cups of 1/2 & 1/2
nutmeg
salt & pepper to taste

Notes:
I use butter. Especially when a recipe calls for it. Never margarine. You must use butter for this recipe!!

I only had heavy cream or 2% milk. I didn't have 1/2 & 1/2. So I used half heavy cream and half 2% milk. You could probably use just the 2% milk, but you wouldn't have the same flavor.

I like my vegetables chopped up small for this soup so that you taste more of the sweet corn than anything else. But you could leave your vegetables in bigger chunks.

I like to use white corn for this because it's nice and tender and sweet. Unfortunately all I had was really sweet corn. Which was good for this soup, but not as good as the white corn. Trust me on this!!

You can use chicken stock for this soup or vegetable stock. I use vegetable stock.

Melt the butter in a medium sauce pan. While butter is melting chop up onion, carrot, garlic and celery.

 Add the vegetables to the melted butter and saute them until soft. Add the flour and mix until you have a paste.


 Cook this mixture for about 2 minutes to cook the flour taste out. Slowly add the stock to this mixture and stir while you add so you don't get lumps. Once all of the stock is incorporated, add the 1/2 & 1/2. Stir until incorporated. Add the corn. 


Add 1 tsp of nutmeg and salt & pepper to taste. Let cook for about 20 minutes so that the flavors blend together. Serve with bread.


Enjoy!!!

Wednesday, June 12, 2013

Sangria

Sangria is like a party in your glass!! Oranges, lemons, limes, Rum and of course Wine were invited to this party, but you can invite anything or anyone you like to yours.

I went on a trip through the wine country in northern California and one of my stops was Sonoma, CA   It was fun exploring and sampling the various wine the area had to offer.  At one of the wineries, I had decided to joined a wine club for a year which meant every month I got two new bottles of wine. The only problem was that they kept sending me a very dry red wine which I'm not real fond of. I must have joined the wrong club!

What do you do when you have wine that you're not real fond of, but you don't want to waste it? You make Sangria with it. It will convert that wine into the most delightful drink you could imagine.

I would make this for my husband and I when we would watch the movie Sideways. Have you seen it? I love it. Anyways, every time they would drink a glass of wine in the movie, my husband and I would drink a glass of Sangria. By the end of the movie....well lets just say you're pretty much lovin life and all is good with the world!!

Teri

Notes:
I use a spiced Rum instead of a clear Rum for my Sangria. Captain Morgan's to be exact. It adds a nice flavor, but you could use a clear Rum if you like.

As far as fruit, you could add peaches, strawberries, grapes, mango's...what ever your favorite fruit might be.

You could use a white Wine instead of  Red wine if you prefer. Most of the wines we got were Merlo's and I'm not real fond of Merlot wine so I would make Sangria out of that.

Sangria


2 oranges
2 lemons
2 limes
1 cup of sugar
1 cup of Rum
1 cup of Orange Juice
12 oz of lemon lime soda
1 bottle of wine


Cut up fruit in slices and then in halves; squeeze juice in pitcher and then put fruit in pitcher.


Add sugar and rum.


Mix everything with a spoon smashing the fruit as you stir to let out the juices. Cover pitcher with plastic wrap and let sit overnight in your refrigerator.


Right before you are ready to serve, add entire bottle of wine, Orange Juice and lemon lime soda. Stir
mixture together. (I got a surprise when I opened the bottle of wine. I thought it was red, but it was actually white!! Like I said, you can use any kind of wine.)


Serve in glass over ice.


Cheers!

Friday, May 24, 2013

Granola

I remember back in the 70's (ok, I'm showing my age) when Granola became the "thing to eat"!! Euell Gibbons was asking people if they had ever eaten a Pine Tree and granola was becoming the rage!!

Granola is one of those foods to take along with you to munch on when you're hungry. You can keep a stash in the car for those long car rides or just to munch on when your on your way home from work when you just need a little something to tide you over until dinner.

I'll let you in on a secret.......

It's really easy to make!! You'll have a batch ready in no time. Ready for your munching pleasure.

I made this batch for my friend Jonathan at work. He's having issues with his cholesterol and so I made  this recipe for him to munch on and hopefully to help with getting his cholesterol in check. Oats are good for your cholesterol.

As far as the cafe, we couldn't keep enough of this on our shelves. You see there was a gym up the street from the cafe and the morning ladies wanted a place to relax after their workouts. So they would come to the cafe and munch on the granola and talk about life over a cup of coffee. Granola and coffee, life was good.......

Teri

Notes: You can use any kind of nut you like. I used sliced almonds in mine, but walnuts or pecans or even peanuts would be good.

You can also use any kind of dried fruit you want. You can use just one type, or you can add a mixture of several kinds of fruit.

Granola is great on yogurt, ice cream, as a topping for a coffee cake or just to be eaten by itself. I enjoy it with yogurt!!

Granola


3/4 cup oil (I use canola, I would stay away from vegetable oil)
1/2 cup honey
1 cup brown sugar
1 tblsp vanilla
1/2 tsp salt
8 cups of old fashioned oats
1/2 cup sweet coconut
1 cup almonds (I used sliced, but you can use any kind of nut you prefer)
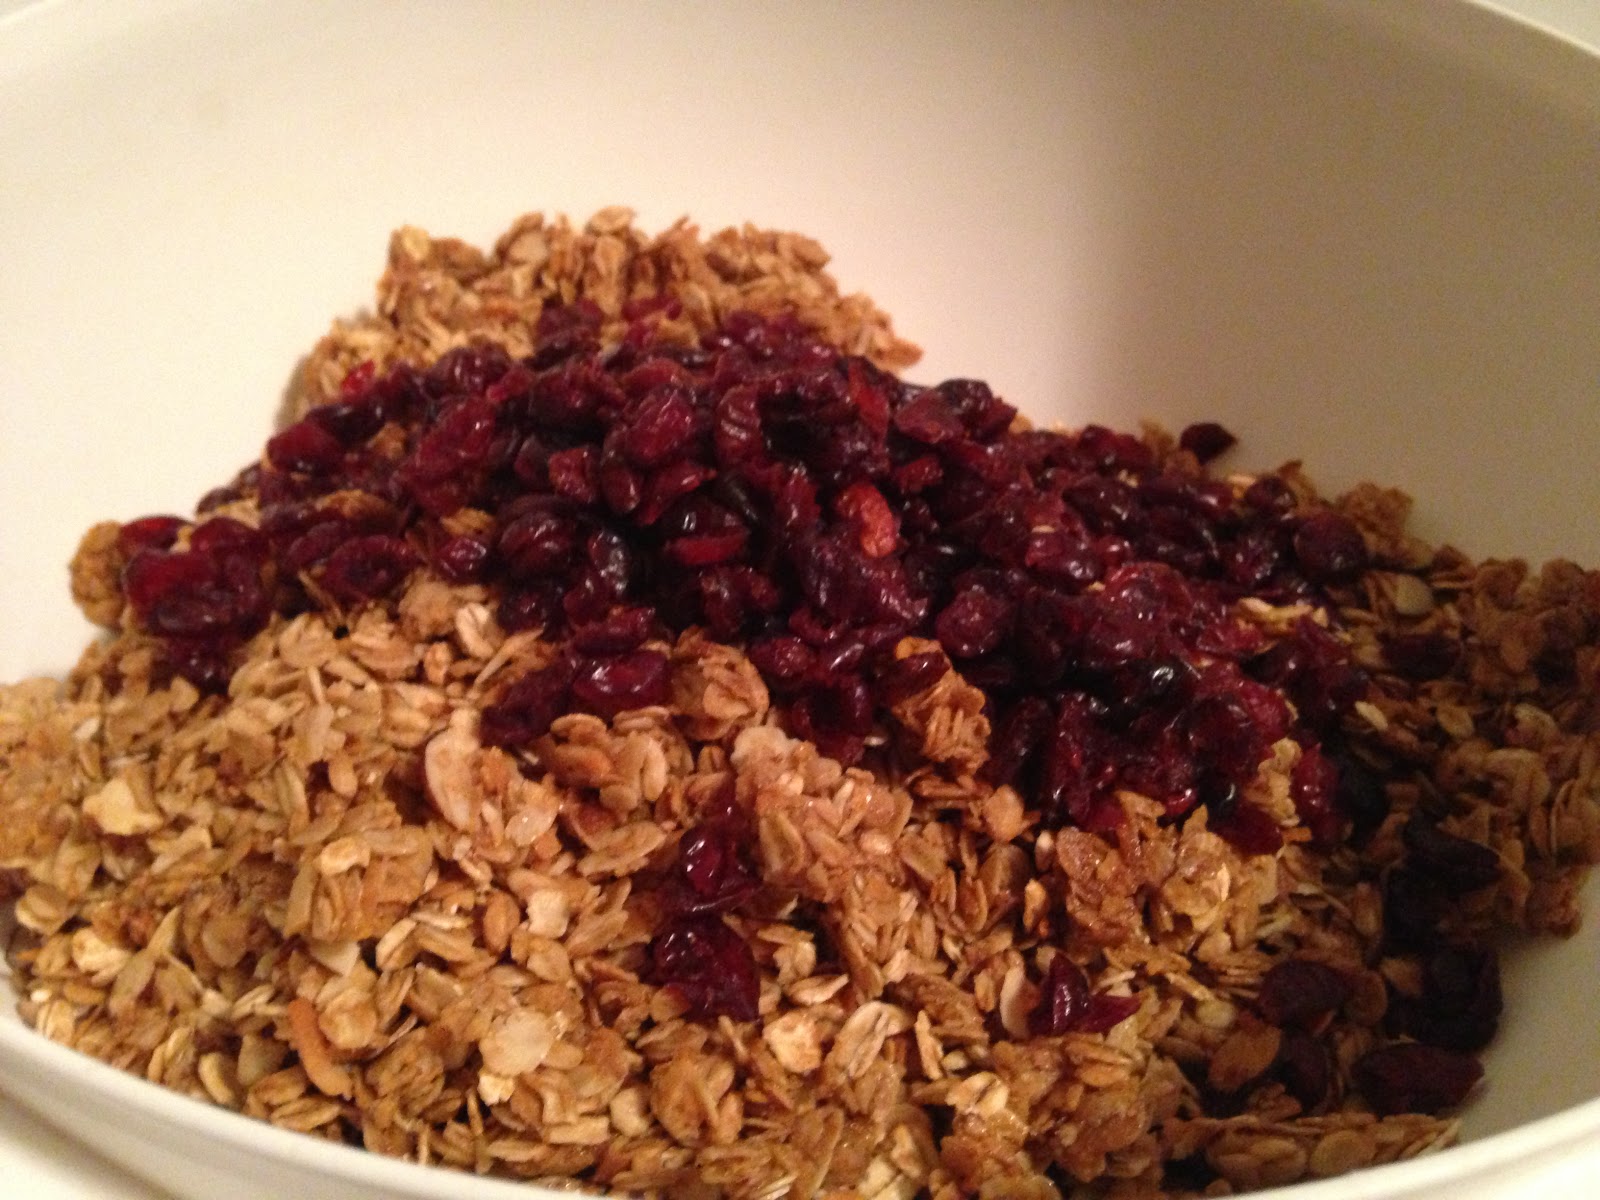
1 cup craisins (I used craisins, but you can use any type of dried fruit you prefer)

Heat oven to 325 degrees

In a small saucepan on top of stove, mix oil, sugar, vanilla, honey and salt together and heat until sugar is melted. About 5 minutes
 
Combine oats, almonds and coconut in a large bowl. Once mixture above is ready, pour over oats and stir to cover.


Prepare two cookie sheets with either parchment paper, foil or some kind of lining. I use my silicone mats. Divvy up the granola between the two pans and spread it out.
Bake in oven for 15 minutes. Take pans out and stir the granola and spread back out. Put pans back in oven for 15 more minutes. Take pans out. If the granola is a golden brown, it's ready. If it's not, then back it for a few more minutes or until golden brown.

Let cool. Add craisins.
Store in an air tight container. Will keep for 6 weeks.

Enjoy!

Thursday, May 16, 2013

Chocolate, Peanut butter, Rice Krispy Treats

aka Rice Krispy Treats on steroids!

Who doesn't love Rice Krispy Treats? It's one of those treats that can take you back to your childhood in a split second. It's summer time and mom doesn't want to bake and make the kitchen hot, so she makes these wonderful treats.

My mom used to make a version that had butterscotch chips in them with chocolate on them. They were called "Scotcharoos" or something like that. The version that I make is a combination of the two. These have that same butterscotch flavor, but they also have peanut butter mixed in. aka Rice Krispy Treats on steroids!!

We used to make these in the cafe and officer Dan would come by everyday and buy two of them. One for him and one for his kids to share. I'm thinking most days that second one never made it home.

Teri

Note:
The trick to pressing down the Rice Krispy part with out making a huge mess is to wet your hands and then press down. The mixture will not stick to your hands!!

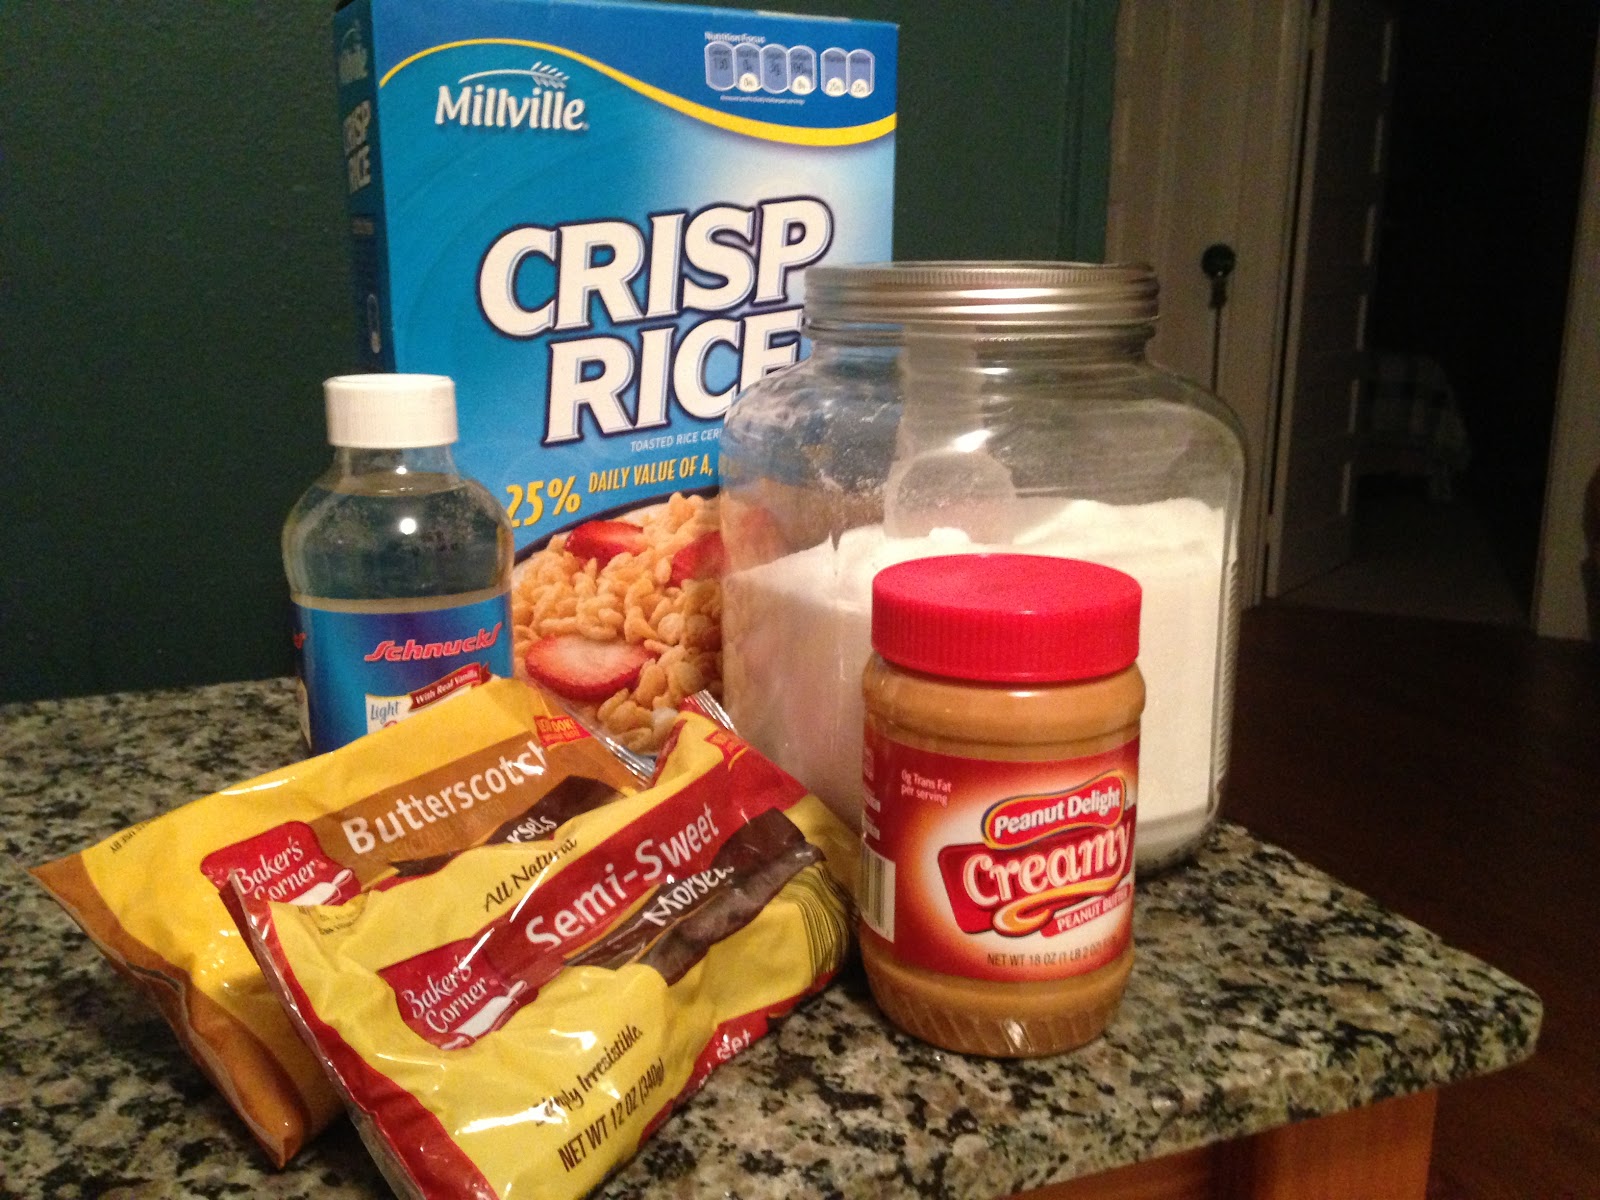
Chocolate, Peanut butter, Rice Krispy Treats


1 cup of sugar
1 cup of corn syrup
1 cup of peanut butter
6 cups of Rice cereal


Frosting

1 cup of semi sweet chocolate chips
1 cup of butterscotch chips
                  

Directions:

Heat the sugar and corn syrup until it comes to a boil. Remove from the heat and stir in the peanut butter.


 Stir in the Rice Krispies.


Press the mixture into the13 x 9 pan lined with foil and sprayed with pam. (I use a butter flavor spray) 


Frosting:

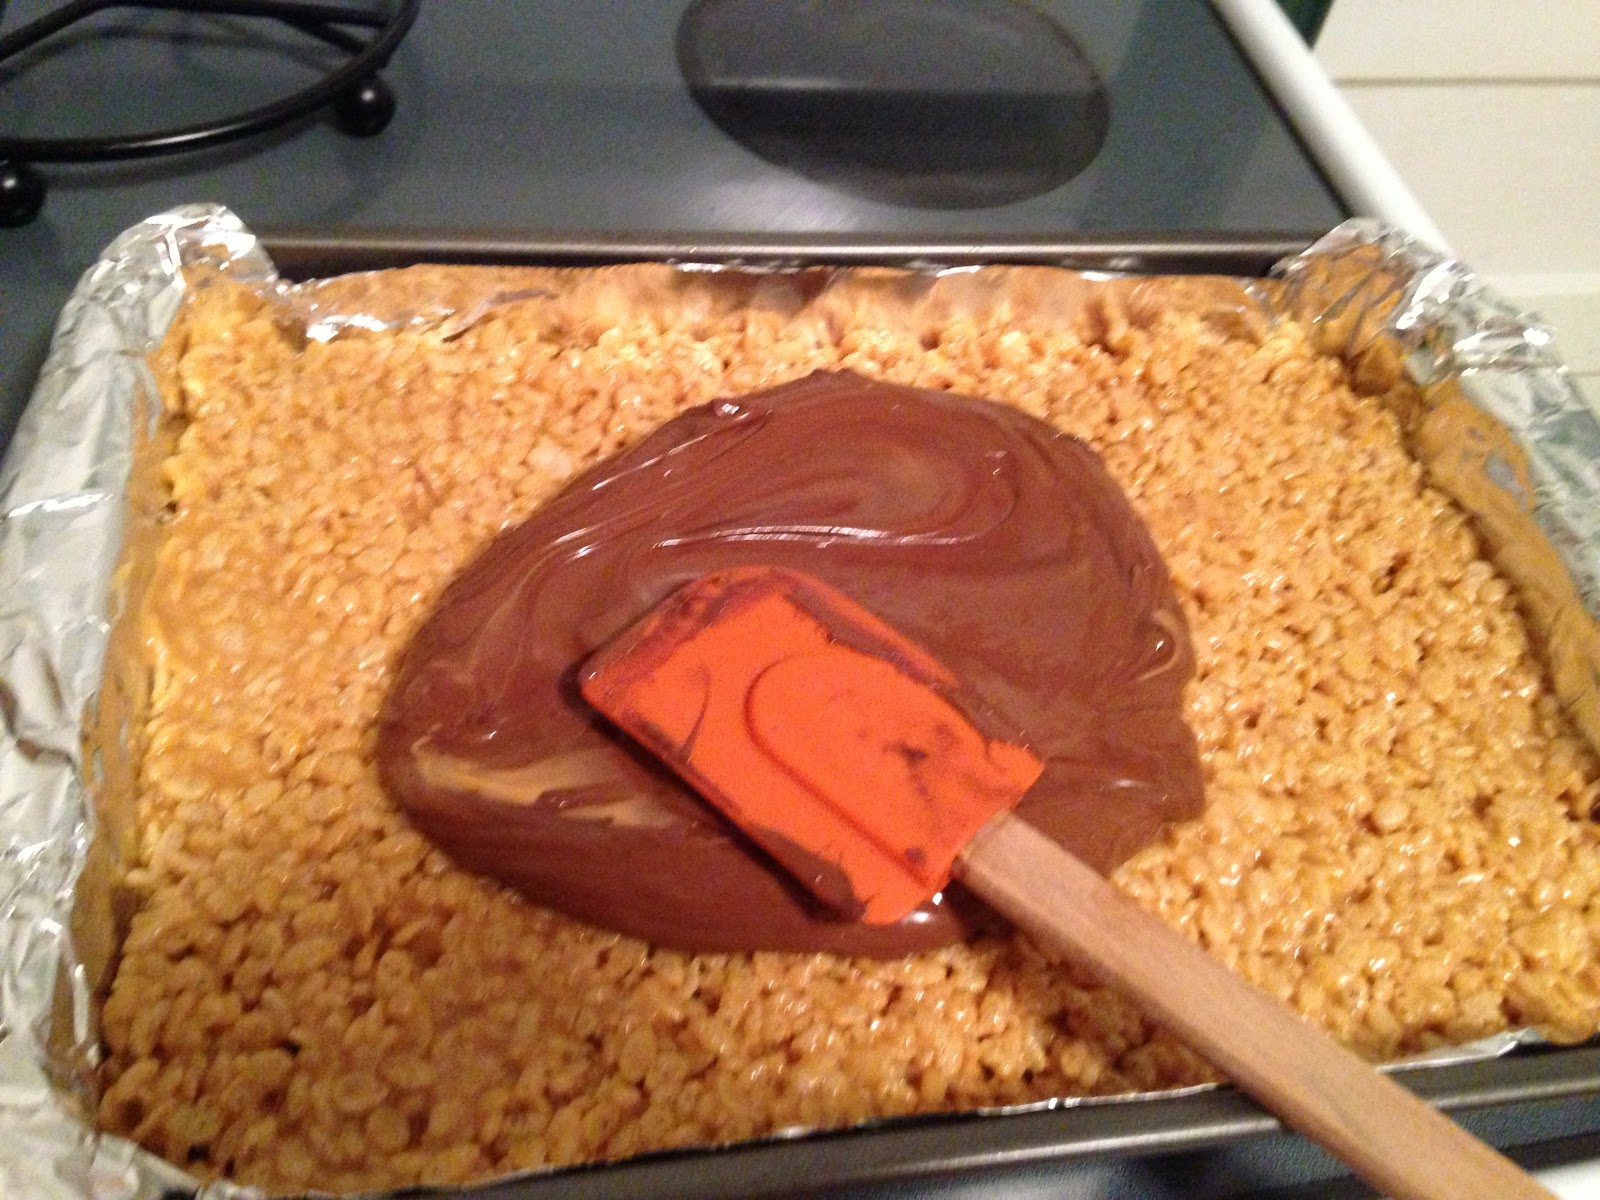
Melt chocolate chips and butterscotch chips together; stir once they are melted. I melt them in the microwave, but you can use the double boiler method for melting. Spread on the bars immediately.


Chill in the refrigerator until set. Cut bars and serve.
 
Enjoy!!

Monday, May 6, 2013

Chicken Tortilla Soup

Happy post Cinco de Mayo!!!

In honor of Cinco de Mayo I'm sharing with you the cafes Friday soup. We made our soups home made everyday. Not only is soup fairly easy to make, but there is nothing like a home made soup to warm the soul on a rainy, dreary Sunday afternoon.

I found this recipe in a cook book I bought when I took my trip to San Antonio. We took a day trip to Fredericksburg, TX which is a cute little touristy town filled with wonderful shops and restaurants.

My friends and are were walking around town and walked by a bakery. I had a taste for cookies (something I can never pass up) So we walked up to the door. But at 1:30 on a Saturday afternoon they were closed with a sign on the door that read "all sold out". So not giving it much thought, we kept wandered on our way. One of the shops we went to was a quaint little book store where I found this cookbook that the woman who owns the bake shop wrote. The girl that was helping me told me that her Fruit Empanadas recipe was alone worth the book.

Fruit Empanadas? Sold out sign? I had to have this cookbook; so, I bought it!

Now I'm one of those strange people that LOVE to read cookbooks. So guess what I read on my flight home? (OK that was probably an easy one) Her book had all these wonderful recipes and we tried many of her recipes at the cafe. As a mater of fact, my book is all torn up and food stained on most of the recipes we used!

I should buy a new one. But what a wonderful thing to pass down to my daughter or granddaughter. An old stained, highly used cook book!!

This soup would be a wonderful addition to any ones repertoire. Happy Seis de Mayo!

Teri

Notes: We served this with tortilla chips and shredded cheddar cheese on top.
I cook the chicken in water in the oven. You can use the water/broth that comes from this as part of your soup base. If you use this you might have to add some chicken bullion to have more of a chicken flavor.

Ingredients


2 tbls. olive oil
1 medium onion diced
1 red bell pepper diced
6 garlic gloves diced
2 cups of corn
1 tbls minced chipotle pepper in adobe sauce (1 pepper)
2 tsp. cumin
2 tsp. chili powder
3 medium sized chicken breasts cooked and shredded
1 can diced tomatoes
8 cups of chicken broth
Salt & pepper to taste

Instructions

Cook and shred chicken.


In an 8 quart pan, (I used my dutch oven) heat olive oil. Add onions, garlic and red pepper to oil. Saute until onions are translucent. Add cumin, chili powder and chipotle puree to pan and stir.


Add diced tomatoes and corn and stir; add chicken broth. Stir all ingredients together. Add shredded chicken and cover and simmer for 20 minutes.
 
Serve in bowls and garnish with tortilla chips and shredded cheddar cheese.

Enjoy!!

Thursday, April 25, 2013

Outrageous Brownies

Need I say more? Doesn't the title just say it all?

This Brownie recipe is an Ina Garten recipe. (of course...the food network) I saw her make them on her show once and decided to give them a go.

I have to warn you, they are expensive to make, but they are sooooo worth it!!! This is one of my favorite brownie recipes. They are very rich and fudgey, everything you want in a brownie.

My friend Keith that I work with had a death in the family, so I made these brownies for him.

Chocolate = comfort, comfort = love, love = brownies. See how I did that? Brownies love me and I love brownies!! It's a mutual thing. :-)

We made these brownies a couple of times at the cafe, but everyone was so used to our other brownie recipe that these ended up going by the wayside most of the time. What a shame. Because trust me, once you try these, you will love them. And based on my math above, the brownies will love you back.

Teri

Notes:  Like most things made with chocolate where the chocolate flavor shines, the better the chocolate, the better the taste. I use Ghirardelli Chocolate because I think it has a great taste. You can use Scharffen Berger Chocolate, but you really don't need to go to that expense.

I also didn't add a complete pound of chocolate to the butter and unsweetened chocolate that gets melted. I only added 12 oz. I don't think that the 4 oz that's missing made a huge difference.

You can add a different nut if you like other than walnuts. I believe walnuts go with brownies, but if you believe a different nut does, by all means, use it. Or if you have an allergy to nuts or don't like them, leave them out!! Either way is good.

These can be frozen. I like to freeze them and take them out when I need a chocolate kick. They are just as good as the day I made them. I've frozen them for up to a month, but only because they never last further than that!

You can also warm these up and serve them with some Vanilla Ice cream. That will take them from outrageous to over the top!!!

Outrageous Brownies


1 pound unsalted butter
1 pound plus 12 ounces semisweet chocolate chips
6 ounces unsweetened chocolate
6 extra-large eggs
3 tablespoons instant coffee granules
2 tablespoons pure vanilla extract
2 1/4 cups sugar
1 1/4 cups all-purpose flour
1 tablespoon baking powder
1 teaspoon salt
3 cups chopped walnuts

Directions

Preheat oven to 350 degrees F.
Butter and flour a 12 x 18 x 1-inch baking sheet.

Melt together the butter, 1 pound of chocolate chips, and the unsweetened chocolate in a medium bowl in the microwave. I started at 1 minute with just the unsweetened chocolate because it takes longer to melt. Then added the butter and chocolate chips and microwaved for 2 minutes in 1 minute increments; stirring after each minute. You might need to microwave longer if not fully melted. But all should be smooth and melted. If you don't want to microwave you can put all in a double boiler and melt mixture that way.


In a large bowl, stir (do not beat) together the eggs, coffee granules, vanilla, and sugar. Stir the warm chocolate mixture into the egg mixture and allow to cool to room temperature.
In a medium bowl, sift together 1 cup of flour, the baking powder, and salt. Add the cooled chocolate mixture to the flour mixture.
Toss the walnuts and 12 ounces of chocolate chips in a medium bowl with 1/4 cup of flour, then add them to the chocolate batter.  This helps to keep the chocolate chips and walnuts from sinking to the bottom.


Pour into the baking sheet.
 

 Bake for 20 minutes, then rap the baking sheet against the oven shelf to force the air to escape from between the pan and the brownie dough. Bake for about 15 minutes, until a toothpick comes out clean. Do not over bake!
Allow to cool thoroughly, refrigerate, and cut into squares.

The first time I made this, I didn't refrigerate the brownies before I cut them. Trust me you have to. Otherwise you will have nothing but crumbs on your hands!! I think it has something to do with all the butter that's in them.

Enjoy!!